Company settings overview
A tour of Company Settings for Owners: General, Users, Teams, Quotas and Distribution.
The Company Settings page lets workspace Owners manage their organization's configuration, members, teams, and resource quotas.
How to access Company Settings
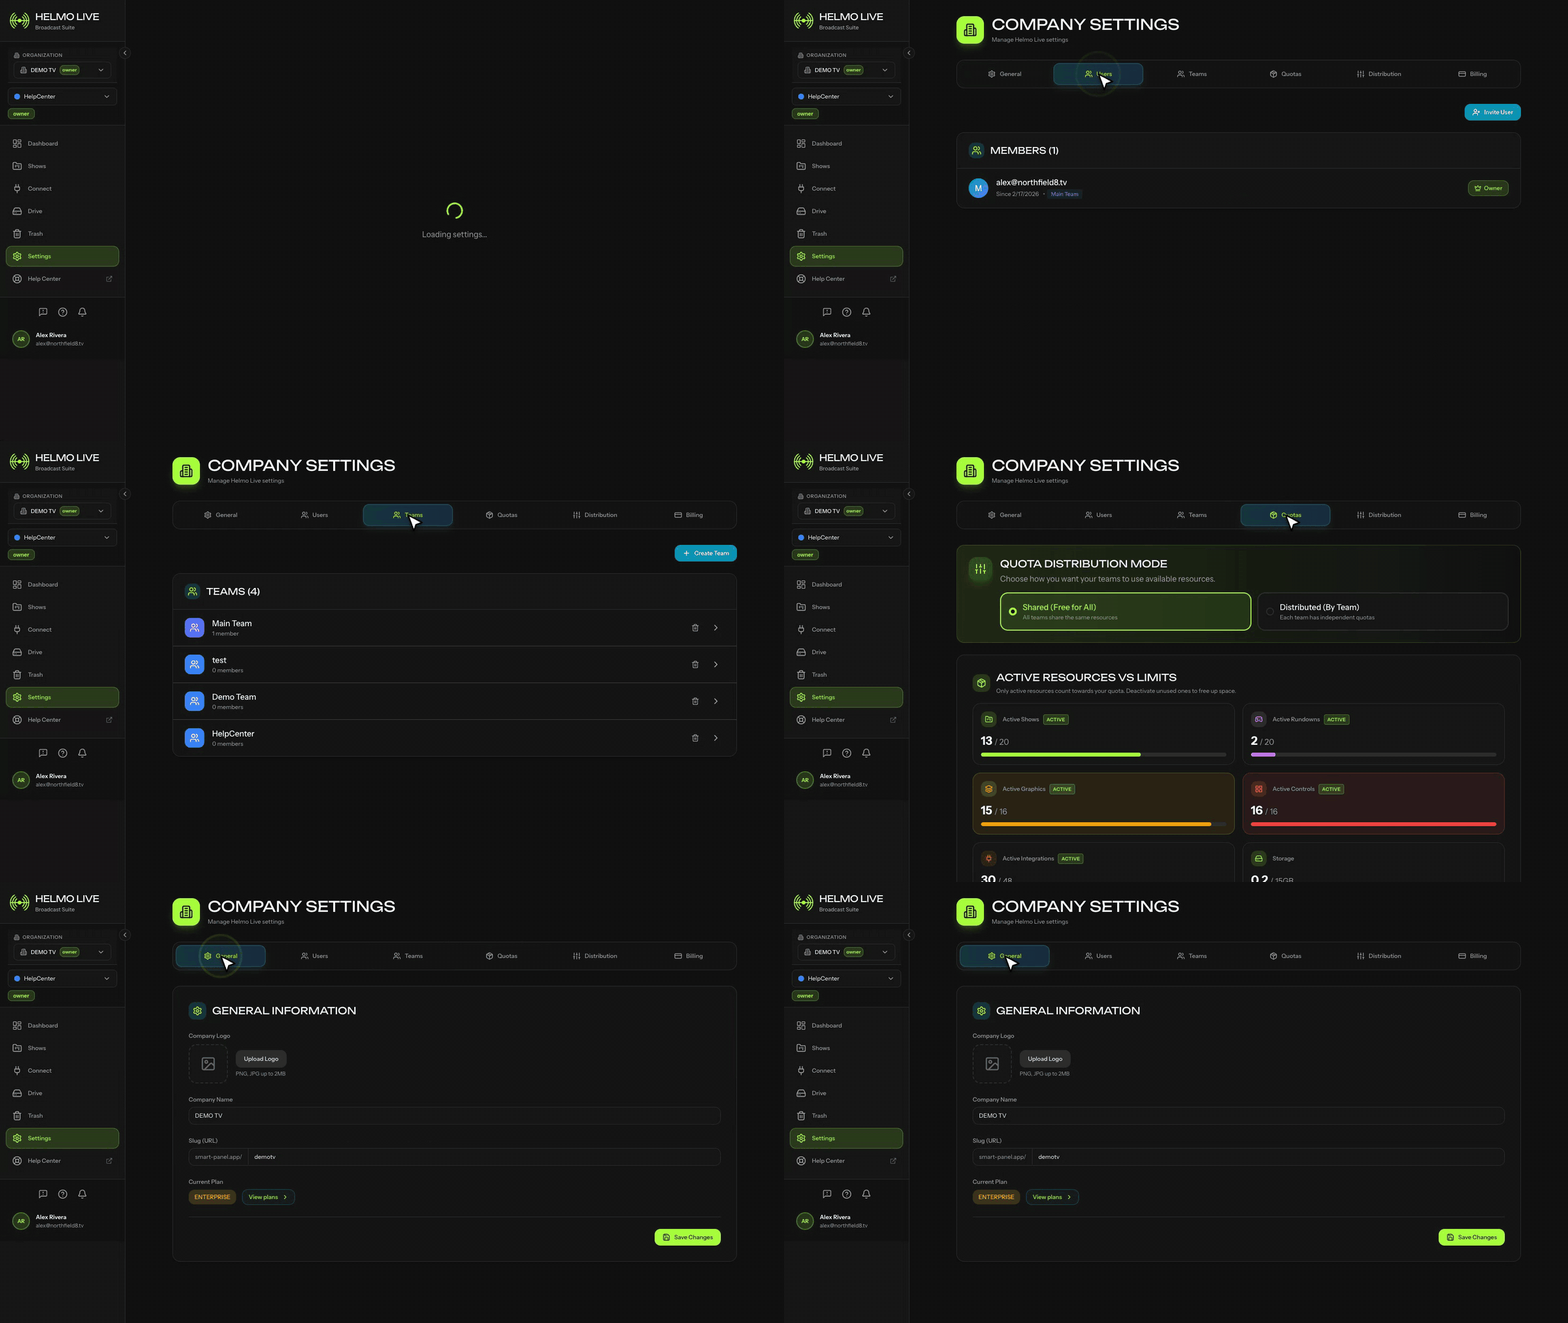
Click Settings in the left sidebar. The Company Settings page opens with a tab bar at the top.
Owners only. Company Settings are accessible only to users with the Owner role. If you need to change settings, ask your workspace Owner for assistance.
General
Manage your organization's identity and subscription.
| Field | Description |
|---|---|
| Company Logo | Upload your organization's logo (PNG or JPG, up to 2 MB). This appears in the sidebar and workspace header. |
| Company Name | Your organization's display name across the platform. |
| Slug (URL) | Your unique workspace URL: https://helmolive.app/your-slug. Used for direct links and sharing. |
| Current Plan | Shows your active subscription tier (Free, Lite, Pro, Studio, or Enterprise). Click to view or change plans. |
Click Save Changes after modifying any field in the General tab. Changes to the slug take effect immediately and update all shared links.
Users
View all workspace members and manage access.
Each member card shows their email, join date, team assignment, and role (Owner, Editor, Producer, Operator, or Viewer). From this tab you can:
- Invite new users: send email invitations with a specific role
- Change roles: promote or demote members (Owner-only action)
- Remove members: revoke workspace access
- Filter by team: see which members belong to each team
See Inviting team members and Understanding roles: Owner, Editor, Producer, Operator, Viewer for more details.
Teams
Create and manage teams within your workspace.
Each team operates as an independent unit with its own members, Shows, and resources. Teams are useful for:
- Separating productions: each team can manage its own shows
- Resource isolation: quotas can be distributed per team
- Access control: members only see their team's content
Click on any team card to manage its members, shows, and settings.
See Creating and managing teams for step-by-step instructions.
Quotas
Monitor your workspace's resource usage against your plan limits.
The Quotas dashboard shows a visual breakdown of:
- Active Shows: how many Shows are currently active vs. your plan limit
- Active Packages: graphics packages in use
- Active Pages: control pages in use
- Active Stories: rundown stories in use
- Storage: Drive usage in GB
Each resource shows a progress bar indicating current usage. When a resource reaches its limit, you'll need to archive existing items or upgrade your plan.
See Understanding quotas and limits for details on how limits work.
Distribution
Choose how resource quotas are shared across your teams.
Two modes are available:
| Mode | How it works | Best for |
|---|---|---|
| Shared | All teams draw from a single pool of resources. First come, first served. | Small teams or organizations where resource needs vary |
| Distributed By Team | Each team gets a fixed allocation. One team can't consume another's quota. | Large organizations with multiple independent production teams |
See Quota distribution: Shared vs. By Team for a full comparison and configuration guide.