Creating a new show
Set up a new production in a few steps, then start adding graphics, control panels and rundowns.
TutorialBeginnerUpdated
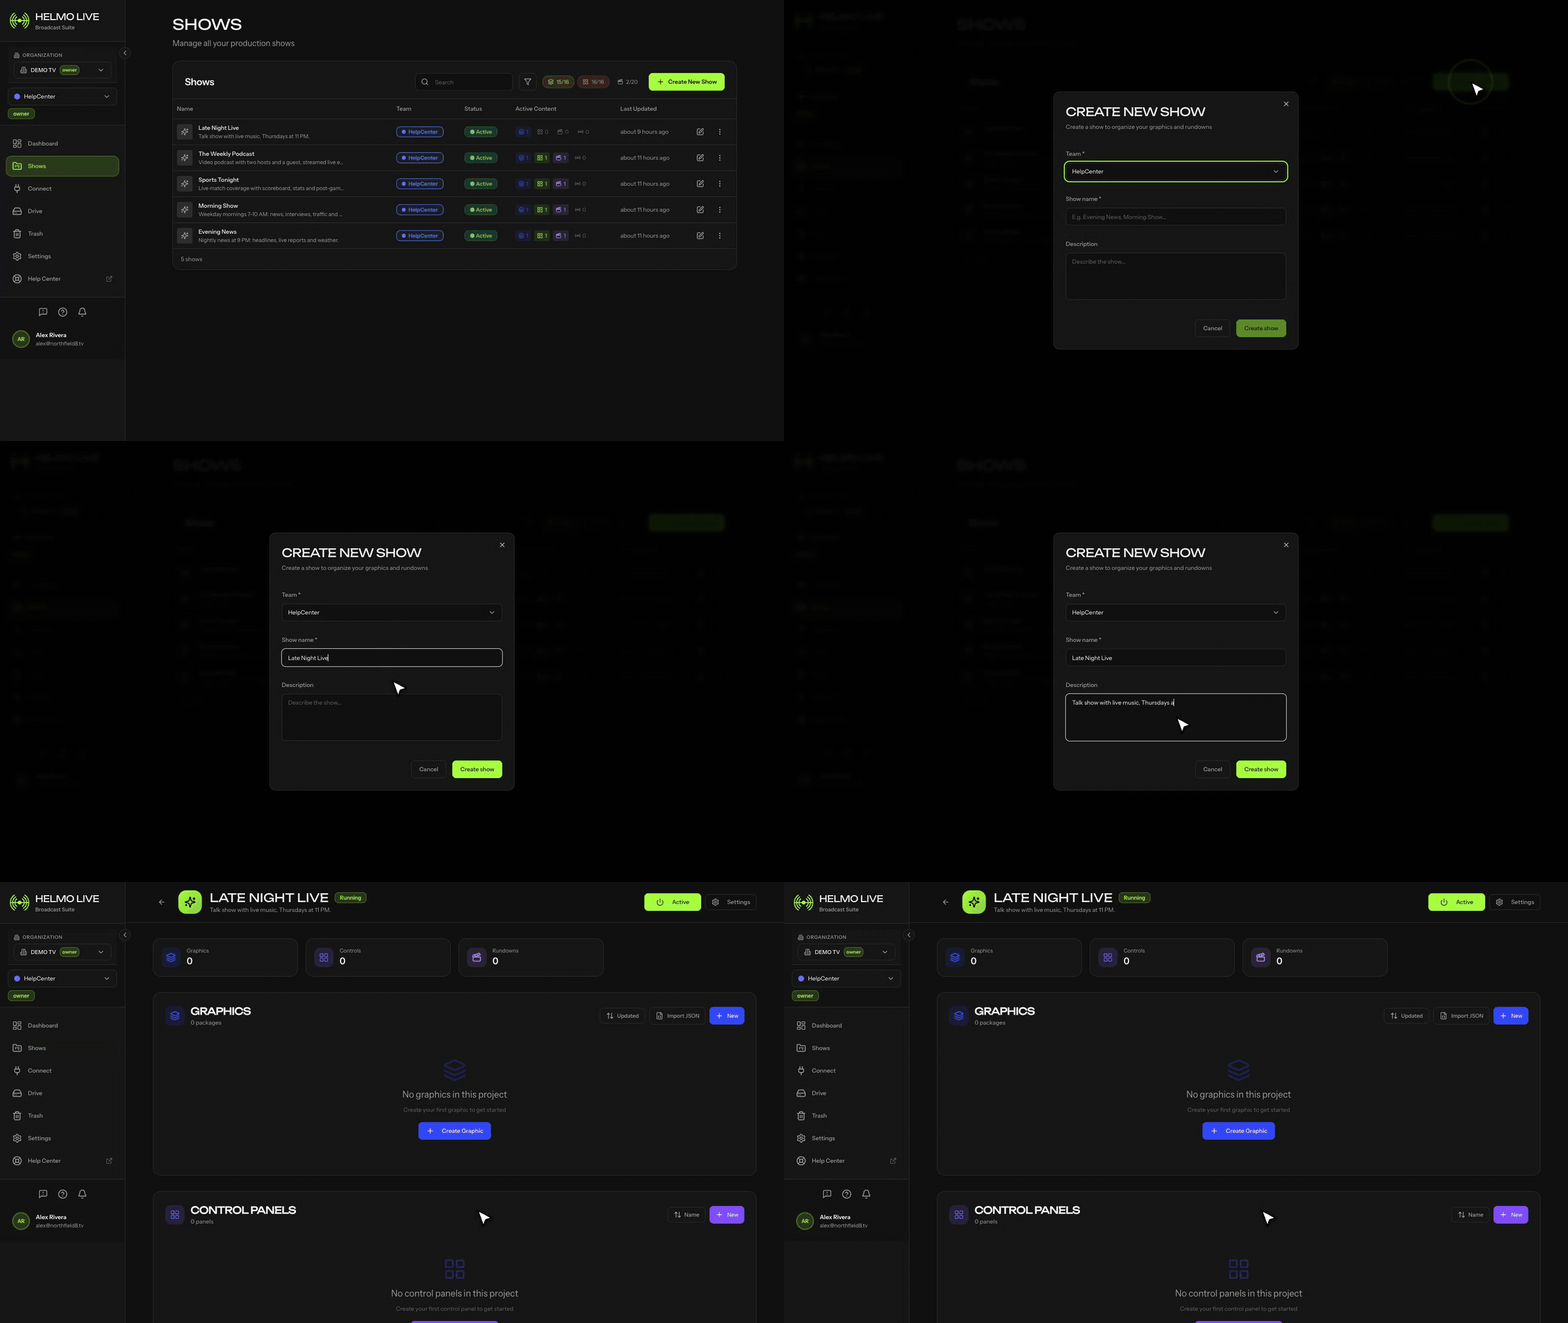
Creating a new Show in Helmo Live takes just a few steps.
Create your Show
| Step | Action | Details |
|---|---|---|
| 1 | Go to Shows | Click Shows in the left sidebar |
| 2 | Click Create New Show | Top-right corner of the Shows page |
| 3 | Name your Show | Use a descriptive name (e.g., "Evening News", "League Match: Team A vs B") |
| 4 | Open your Show | Click on it to enter the Show Dashboard |
Inside your Show Dashboard
Once inside, you will find three sections ready to build:
| Section | What it opens |
|---|---|
| Graphics | Helmo Graphics: design the overlays this production uses |
| Control Panels | Helmo Control Builder: button panels to fire graphics live |
| Rundowns | Helmo Rundown: plan a broadcast with segments, stories and elements |
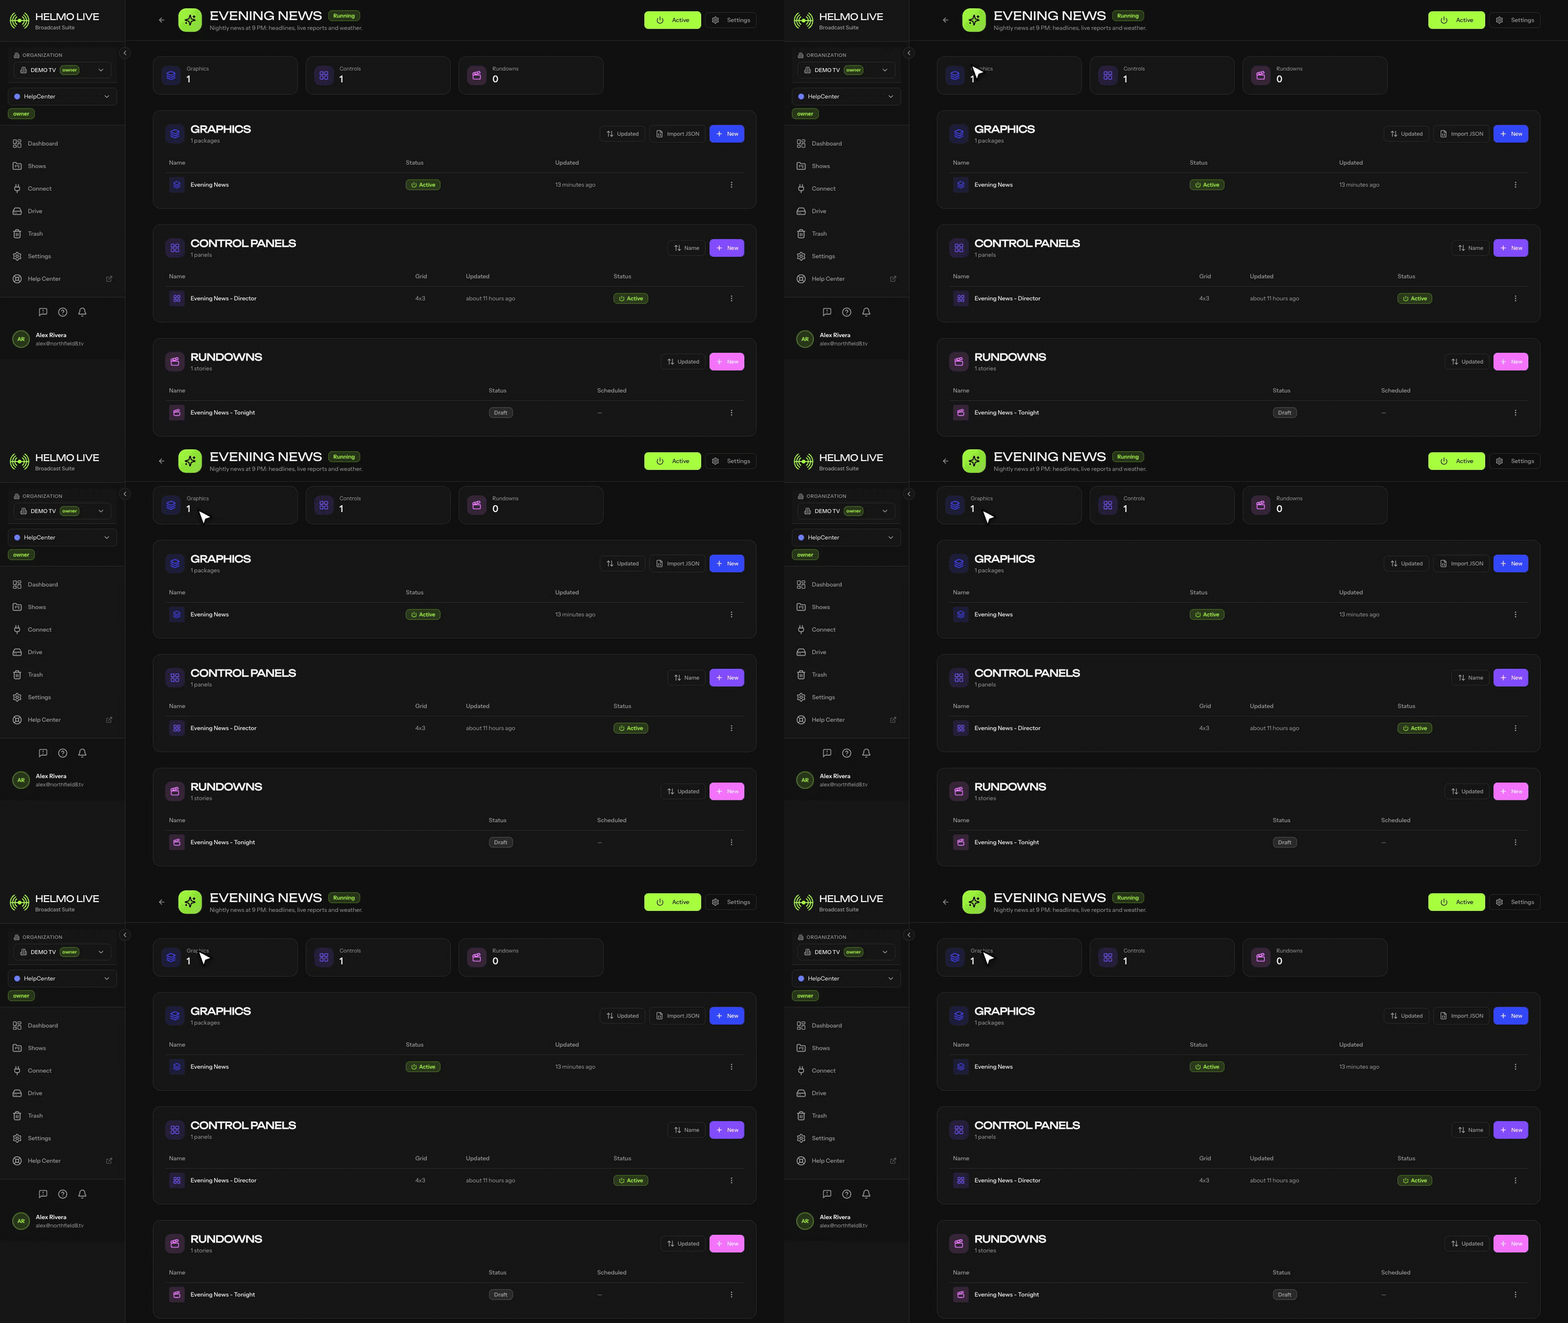
A Show can hold several Rundowns, usually one per air date. Create a new one for each broadcast rather than reusing the same one.
Recommended workflow
- Set up your integrations: connect OBS, vMix, Viz Flowics or other tools via Connect
- Design your graphics: the overlays this production needs
- Build control panels: buttons to fire those graphics by hand
- Plan your rundown: segments, stories and elements, with timing
- Activate the Show when it is ready for production
Tip
Only active Shows count toward your quota, so keep unused Shows inactive. Clone a Show to reuse its structure for recurring productions. Each Show is isolated: its graphics, rundowns and control panels belong to that Show only.