Creating your first sequence
Build an IN, PATCH, WAIT, OUT Action Sequence triggered by a single button, with optional dynamic inputs.
TutorialAdvancededitorUpdated
Build your first Action Sequence: an automated multi-step workflow triggered by a single button press.
Step 1: Create the sequence
- In Builder, add a new button to the grid
- Set the action type to Action Sequence
- Click New Sequence
- Name it (e.g., "Show Lower Third")
Step 2: Add steps
Click + Add Step for each action in the sequence:
- PATCH: select your integration, Subcomposition, and set field values
- IN: select the same integration and Subcomposition to bring it on screen
- WAIT: set duration (e.g., 5000ms = 5 seconds)
- OUT: select the same integration and Subcomposition to take it off
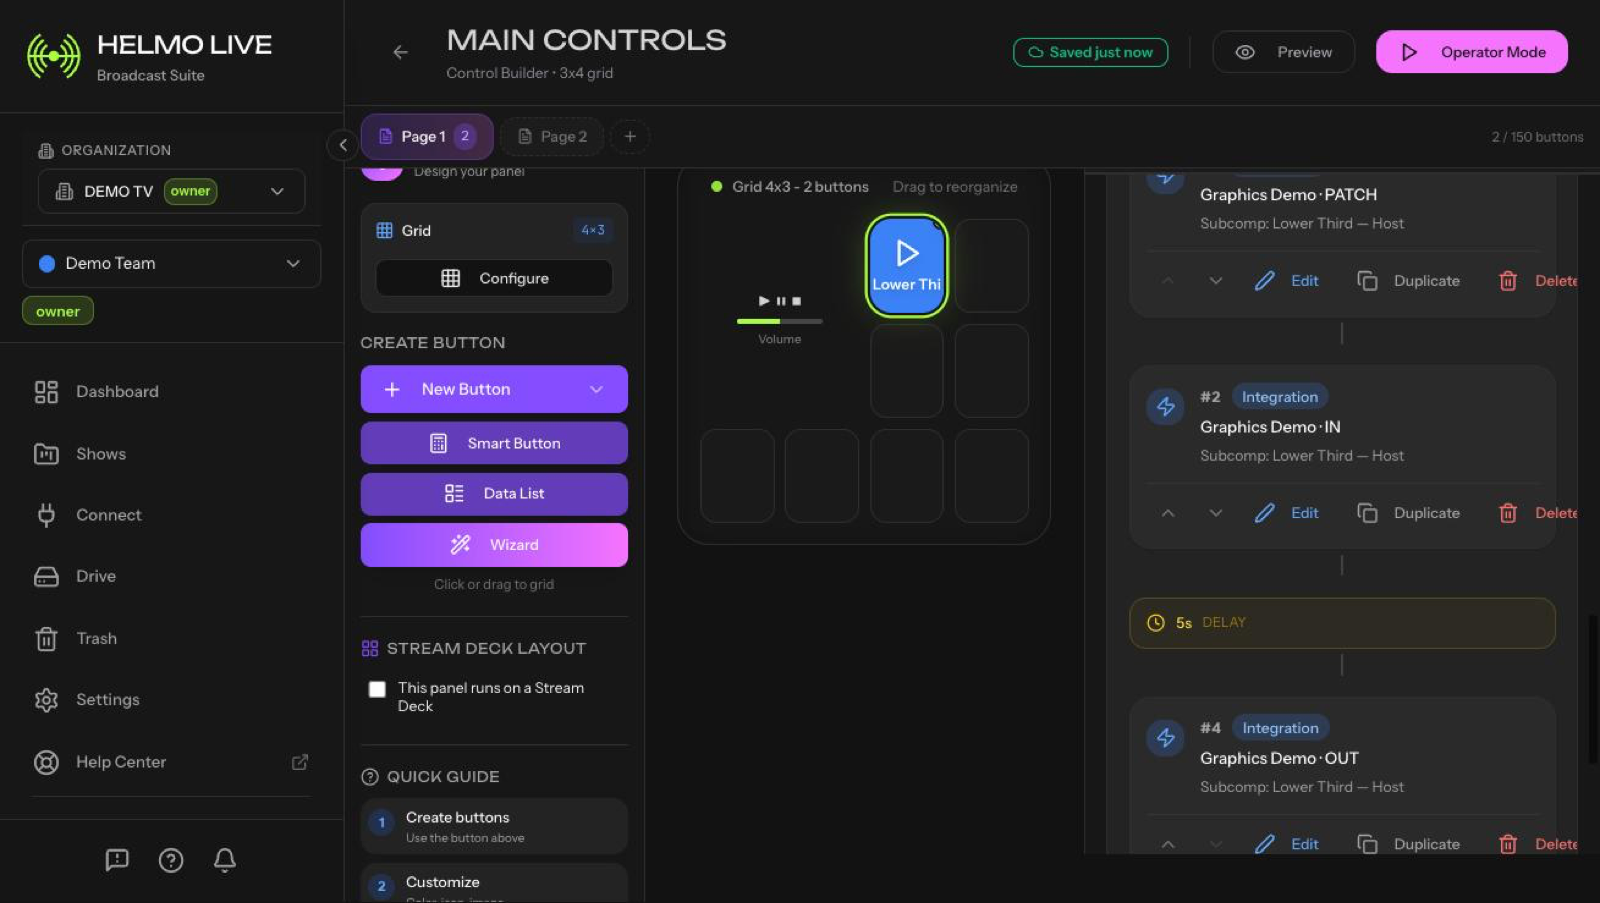
Step 3: Reorder if needed
Drag steps up or down to change the execution order.
Step 4: Add dynamic inputs (optional)
If you want the operator to type different values each time:
- In the PATCH step, mark fields as dynamic inputs
- Give each input a label (e.g., "Name", "Title")
The operator will see text fields next to the button in Client.
Step 5: Save and test
- Click Save
- Open Client using the Preview button
- Press the button to run the full sequence
Watch out
Sequences run fully even if the operator navigates away or presses other buttons. Once started, a sequence completes all its steps in order.
Tip
The editor shows the total estimated duration of all steps combined. Use this to verify your timing before going live.