Create a graphics package with AI (Helmo Graphics skill)
Describe your show to an AI assistant using the Helmo Graphics skill, then import the package file it writes into the editor.
The Helmo Graphics skill teaches an AI assistant how to write a complete Helmo Live graphics package: lower thirds, bugs, tickers, cards, full-screen openers and more, with broadcast-grade animation. You describe your show, the AI writes a package file, and you import it into Helmo Graphics ready to edit and put on air.
What you get
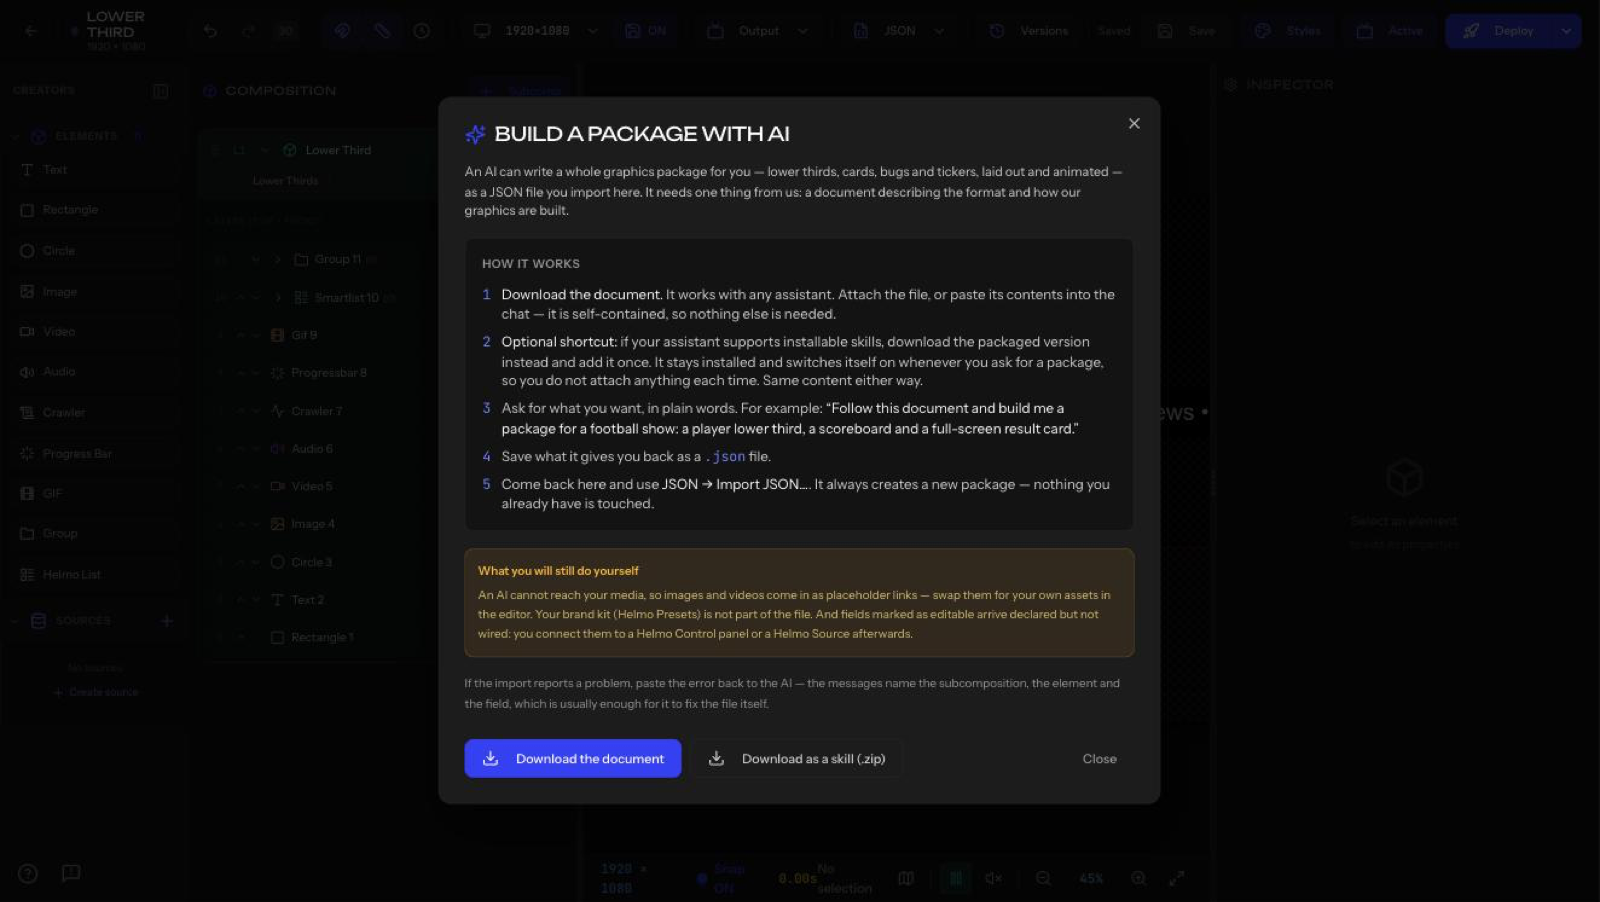
The skill comes in two formats. Both contain exactly the same instructions, so pick the one that fits the AI you use.
- .zip (Claude Skill) for Claude. You install it once and it activates on its own whenever you ask Claude for a graphics package.
- .md (single document) for any other AI assistant (ChatGPT, Gemini and others). Attach it to your chat, or paste its content, each time you want a package.
Step 1: Download the skill
- Open any graphic in the Graphics Editor.
- Open the AI skill dialog and choose .zip (for Claude) or .md (for any other AI).
Step 2: Load it into your AI
Claude: go to Customize > Skills, upload the .zip and turn it on. You only do this once.
Other AI assistants: start a new chat and attach the .md file. If your assistant doesn't accept attachments, paste the whole content of the file into the chat.
Step 3: Write your brief
Tell the AI what your show needs. The more specific, the better the result. A good brief includes:
- The show: type of content, tone and audience (for example, a weekly esports stream or a local news bulletin).
- The graphics: which pieces you need (host lower third, sponsor bug, score bug, ticker, full-screen opener).
- Your brand: colors, fonts and logo placement.
- Live data: what should update on its own, like a clock, a countdown, scores or a Google Sheet.
Example brief: "A beach volleyball stream with two teams, a sponsor bug, player lower thirds and a persistent scoreboard. Colors: navy and sand. Font: Montserrat."
The AI answers with a package file (JSON). Save it to your computer.
Step 4: Import the package
- In the Graphics Editor, open the JSON menu in the top bar and choose Import JSON…
- Select the file. Helmo Live validates it and shows you a preview before anything changes.
- Apply the import: - If the graphic is empty, the package goes straight in. - If the graphic already has content, choose Merge (add the new scenes next to the existing ones) or Replace (swap the content for the package).
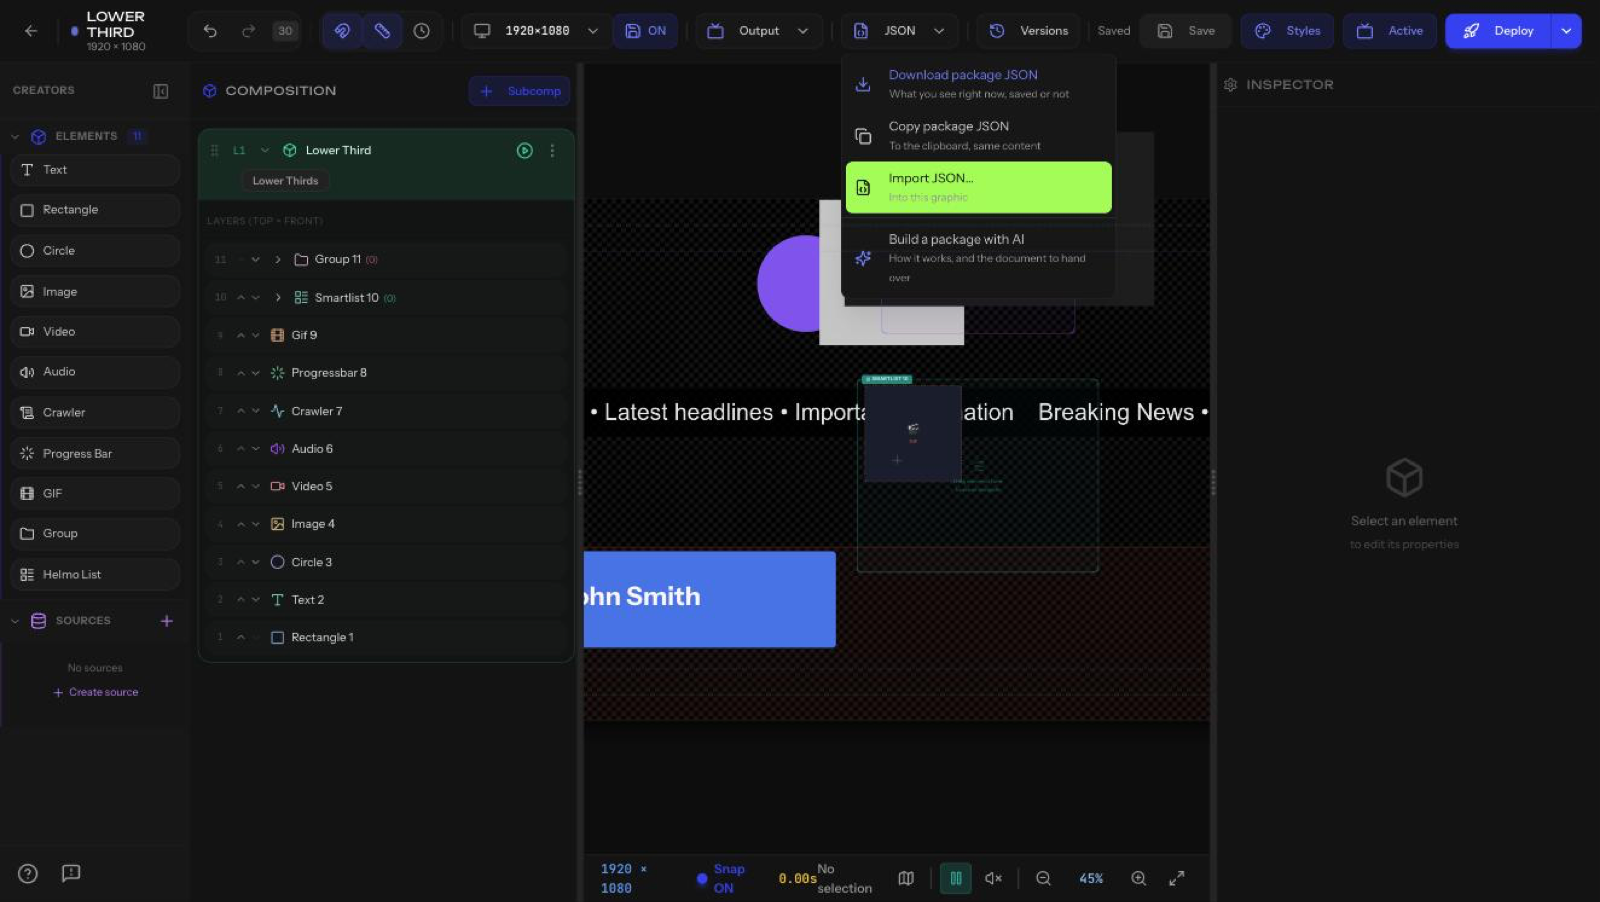
Want the package as a new graphic instead? Use Import JSON from your Graphics list.
If the file has a problem, the import tells you exactly where: which subcomposition, which element and which field. Copy that message back to the AI and ask it to fix the file.
Step 5: Connect what's left
A generated package is a design. Some pieces need to be wired to your setup before they work live, and the AI will list them for you at the end of its answer:
- Editable texts (names, titles, scores) are controlled from a Helmo Control panel.
- Live data needs a Helmo Source pointed at your own feed (for example, your Google Sheet or JSON URL).
- Helmo Lists always arrive unconnected: select the list and pick its source.
These articles walk you through each step:
- Helmo Sources: bind live data to your graphics
- Helmo List: data-driven lists
- Deploying your graphic for live use
Tips
- Iterate in the same chat. Ask for changes like "make the lower third slower" or "use our secondary color on the ticker", then import the new version with Replace.
- Preview before air. Play each subcomposition IN and OUT in the editor before going live.
- Save is not publish. When you're happy, deploy the graphic so your Output URL shows the latest version.